RStudioアドベントカレンダー 25日のエントリーです。
RStudioでブログを書きたい
RStudioは、Rmarkdownの登場以降、メキメキとドキュメント作成機能が充実していってます。私は、RやRStudioが大好きなので、可能な限り、RStudioと対面していたいのです。データ解析、論文作成、ウェルブサイトの構築・更新、今や全てRStudioで完結します (他の方とのやりとりがなければ…)。
前に、RStudioでウェブサイト構築が簡単にできるという僕の最も身近なRおじさん(@kazutan)のツイートみて、いじっていたらほんとに簡単にサイトが立ち上がってとても感動しました。
blogdownパッケージ
その後、特に不満なくRStudioでサイトの管理をしていたのですが、業務上、何か自由にメモや告知をあげられる、ブログのような機能をつけられたらな、と思っていました。何気なくTLを眺めていると、また僕の身近なRおじさん(@kazutan)が、ぼやいてくれました。そして知りました、blogdownパッケージ。僕にとってkazutanは欲しいものを届けてくれる、そう、サンタクロースのような存在なのかもしれません。
以下では、順を追ってみていきます。
1 Githubでリポジトリ作る]
2 RStudioでリポジトリとリンク
3 RStudio上で, ブログサイト構築
4 config.tomlを修正し、俺サイトに
5 投稿チェック
6 出来上がったサイトをcommit push!!
Githubでリボジトリを作る
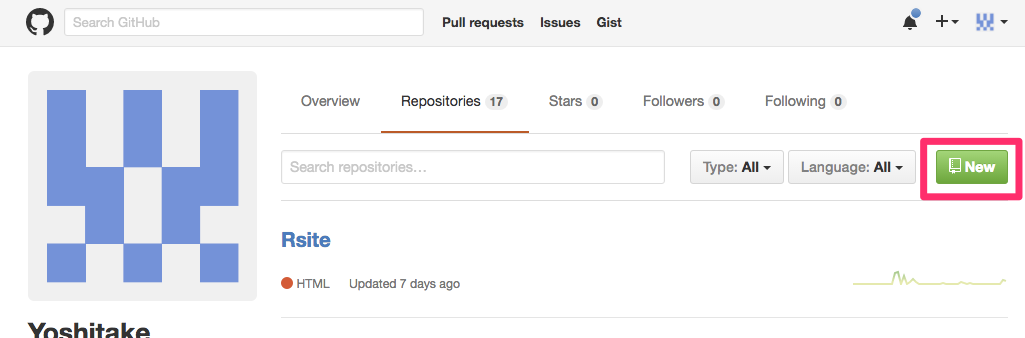
ブログをRStudioを通じてgithubで公開するために, Githubで新しいリポジトリ(Repository)を作成します。下の画像にあるように、Repositoriesタブをクリックして右端に現れる[New]ボタンを押します。
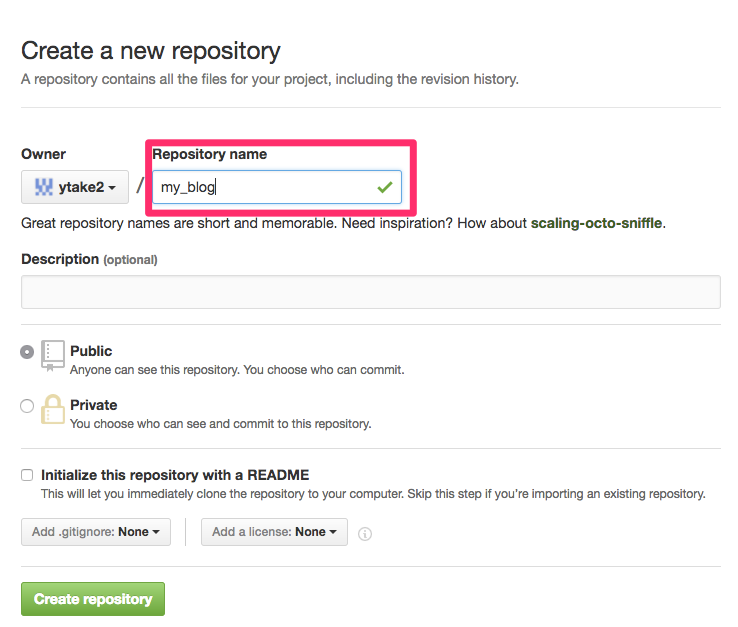
すると以下のページが登場するので、Repository nameに任意の名前を設定します。今回はmy_blogとしました。レポジトリ名を入力したら、一番下の[Create repository]ボタンを押します。
これで、ブログサイトのファイルをあげるためのレポジトリが出来ました。[https://github.com/アカウント名/レポジトリ名.git]をコピーしておきます。
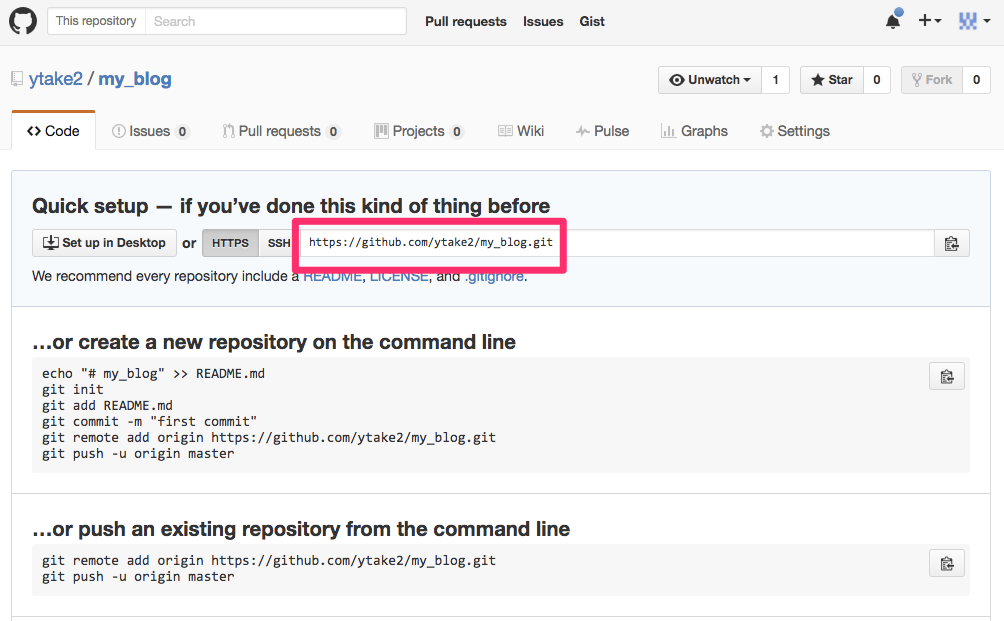
これでgithubの準備は完了です。ここからはRStudioで作業をします。
RStudioでgithubレポジトリとリンク
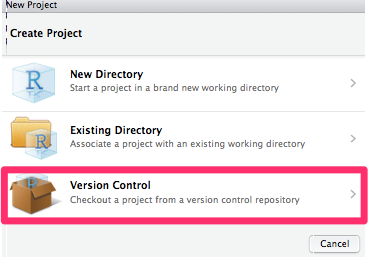
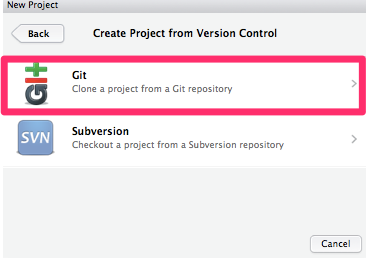
RStudioを立ち上げて[File]->[New Project]->[Version Control]->[Git]と進めます。
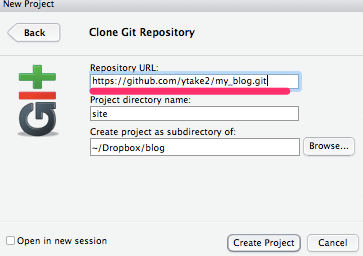
次のClone Git RepositoryのRepository URLの空欄に、先ほど作成しコビーした、ブログ用のレポジトリのアドレスを貼り付けます。下二つの空欄は、任意に指定します。
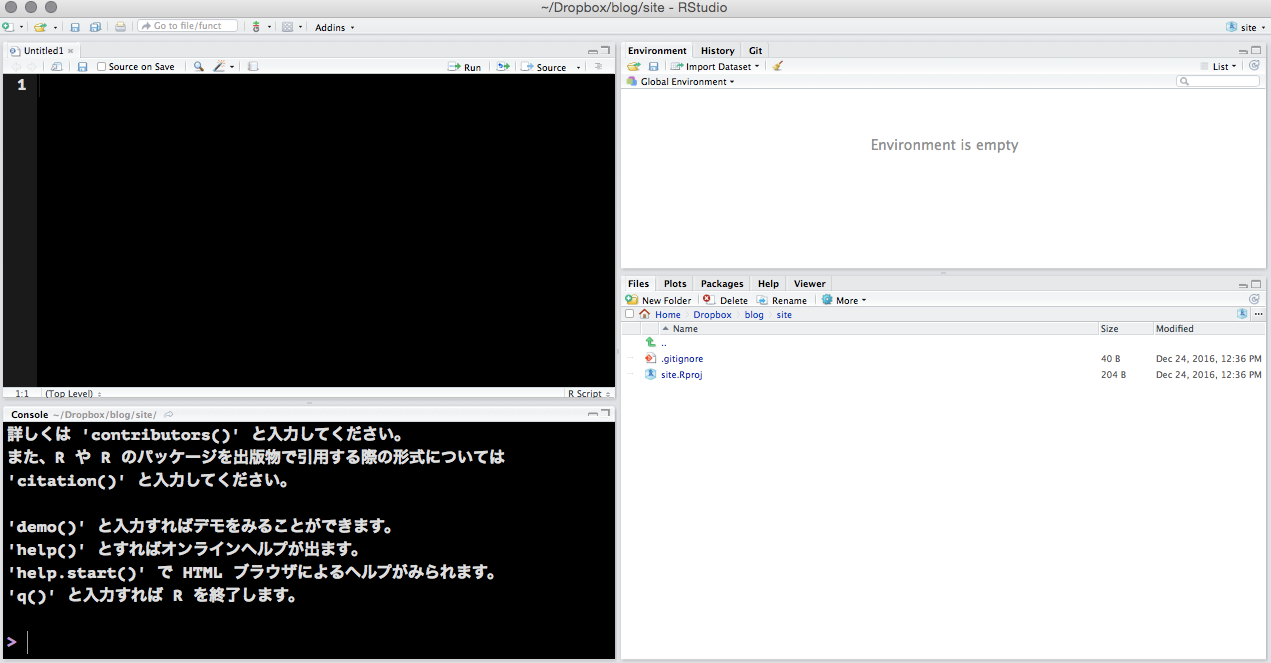
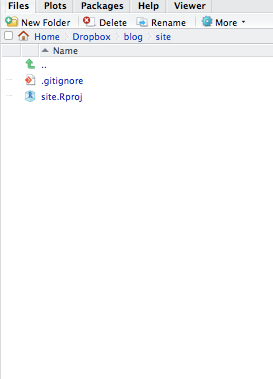
これでRStudio側も準備完了です。今、右下には、siteフォルダには、「site.Rproj」と「.gitignore」のみです。
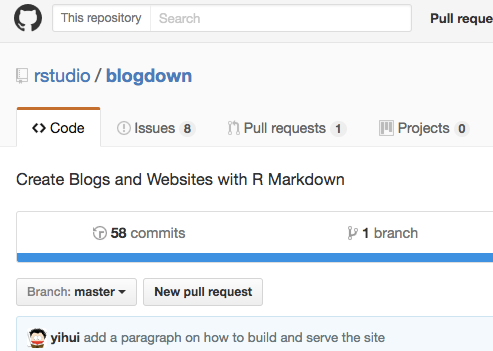
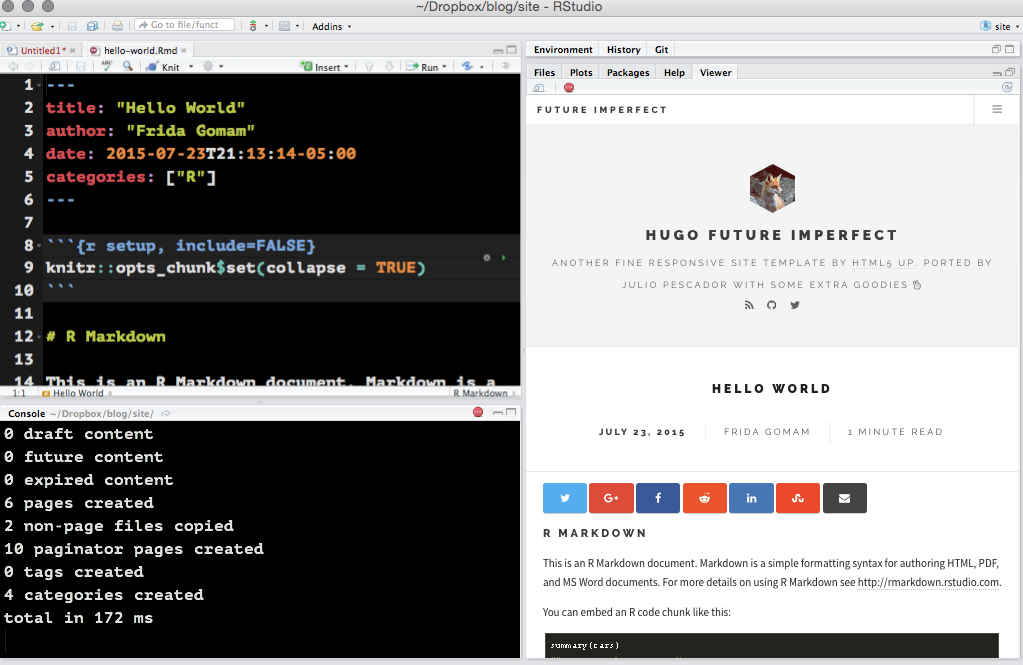
RStudio上で, ブログサイト構築
RStudioでブログサイトを構築して管理するためのバッケージはblogdown(https://github.com/rstudio/blogdown)、開発者はRStudioドキュメント系の神、yihui(https://github.com/yihui)さんです。
!!!
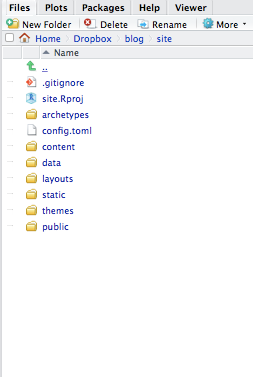
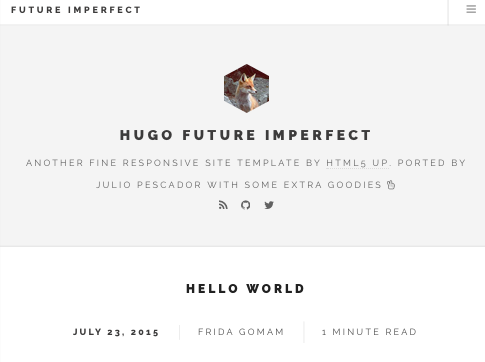
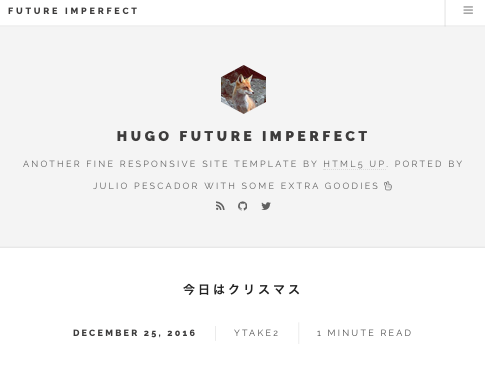
ブログがある。RStudioの中にブログがある
!!!
ほぼ空だったフォルダが、
ブログサイト用のフォルダどっさりに!!!!
ここまできたら、あとはテンプレートを自分のサイト用にカスタマイズしていきます。
編集・投稿
hello-world.Rmdは、「content」->「post」のフォルダ内にあります。これを編集すれば記事内容を編集できます。
元の設定から、
---
title: "Hello World"
author: "Frida Gomam"
date: 2015-07-23T21:13:14-05:00
categories: ["R"]
---
タイトル、名前、投稿時間を変更し、カテゴリーを追加してみます。編集して保存をすると自動的に修正が反映されます。実は、new_site()関数を実行して出てきたRmdファイルをそのまま編集している場合は、ずっと、serve_site()関数が実行されている状態になっており、これによって、自動的に保存内容が反映されるようになっています。
---
title: "今日はクリスマス"
author: "ytake2"
date: 2016-12-25T21:13:14-05:00
categories: ["R","RStudio","blogdown"]
---
元のやつ
修正後は、タイトル、投稿者、投稿日が変わってますね。
カテゴリのタグもしっかりと追加されてます。
修正前

修正後

あとは、記事内容の修正は、普通にRmarkdownで好きなように書けばOKです。
新しい記事の投稿
新規の投稿をするには、postフォルダ内に新しい.Rmdファイルを入れてあげれば良いです。以下のようにコマンドを実行すると、postフォルダ内にRmdファイルが作成されます。このRmdファイルを編集すれば、新しい投稿記事の準備完了です。
new_content("post/newContent.Rmd")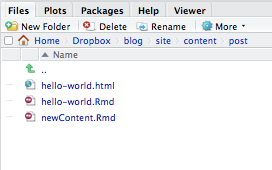
新しい記事をブログサイトに上書きするために、serve状態を解除した後で(赤丸のstopボタンを押す)以下のコマンドを実行します。
build_site() # 編集内容を反映し統合
serve_site() # 反映内容を確認
新規の投稿記事が一番最初にきました。
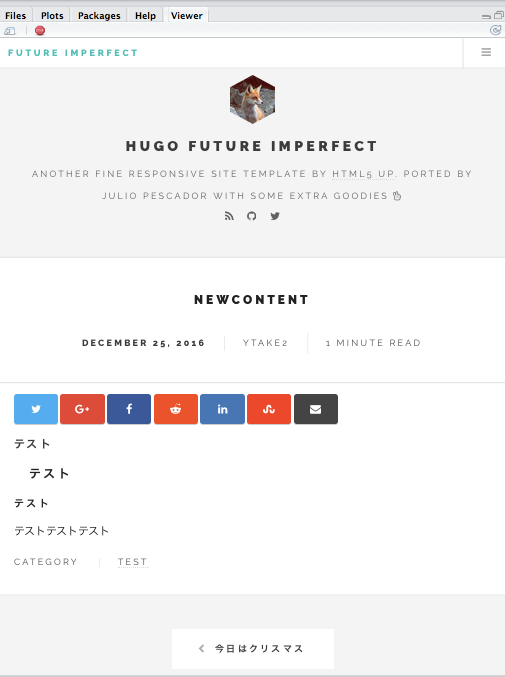
このように、新しくRmdをpostフォルダに突っ込んでいくだけで、どんどんブログを更新できてしまうのです。たまりませんね。
config.tomlを修正し、俺サイトに
hugoでは、.tomlでサイトの外観を設定していきます。「config.toml」ファイルを開きます。 以下のここを修正、と記した部分に自分好みの情報に書き換えます。
baseurl = "/"
relativeurls = true
languageCode = "en-us"
title = "Hugo Future Imperfect" <-ここを修正
theme = "hugo-future-imperfect"
preserveTaxonomyNames = true
paginate = 3
disqusShortname = "shortname"
googleAnalytics = ""

[params]
    # Sets the meta tag description, usually reserved for the main page
    description          = "HTML5 UP theme, Future Imperfect with some extra goodies, ported by Julio Pescador. Powered by Hugo" <-ここを修正
    # This will appear on the top left of the navigation bar
    navbarTitle          = "Future Imperfect" <-ここを修正
    # Social media buttons that appear on the sidebar
    socialAppearAtTop    = true
    socialAppearAtBottom = true
    # set this to the section name if section is not post
    viewMorePostLink     = "/post/" <-blogフォルダは後で消すのでpostに変えておく

# Optional Params
    categoriesByCount    = true
    includeReadingTime   = true
    # The set of favicons used are based on the write-up from this link:
    # https://github.com/audreyr/favicon-cheat-sheet
    # Please see the favicon partial template for more information
    loadFavicon          = false
    faviconVersion       = ""

    # Load custom CSS or JavaScript files. This replaces the deprecated params
    # minifiedFilesCSS and minifiedFilesJS. The variable is an array so that you
    # can load multiple files if necessary. You can also load the standard theme
    # files by adding the value, "default".
    # customCSS            = ["default", "/path/to/file"]
    # customJS             = ["default", "/path/to/file"]

    # Loading min files for exampleSite
    customCSS            = ["/css/main.min.css"]
    customJS             = ["/js/main.min.js"]

# parms.intro will appear on the sidebar
# This is optional, but it's suggested to use
[params.intro]
    header    = "Hugo Future Imperfect" <-ここを修正

    paragraph = "Another fine responsive site template by <a href=\"http://html5up.net\">HTML5 UP</a>. Ported by Julio Pescador with some extra goodies <i class='fa fa-hand-peace-o'></i>" <-ここを修正

    about     = "Lorem ipsum dolor sit amet, consectetur adipiscing elit. Praesent tellus lacus, auctor vehicula molestie quis, tempor quis velit. Quisque in quam ac leo efficitur vulputate. Phasellus ullamcorper aliquam sodales. Maecenas sit amet condimentum ipsum. Proin sit amet ligula elit. Mauris." <-ここを修正

# This will also appear on the sidebar.
# A width of less than 100px is recommended
# This is optional
[params.intro.pic]
    src       = "/img/main/logo.jpg" <-ここに指定されているファイルを自分の好きな画像に置き換える
    # modify your picture in the shape of a circle or
    # future imperfect's hexagonal shape
    circle    = false
    imperfect = true
    width     = ""
    alt       = "Hugo Future Imperfect"

# Adjust the amount of recent posts on the sidebar.
# This is optional. The default value 5 will be used
[params.postAmount]
    sidebar = 2

# Set up your menu items in the navigation bar
# You can use identifier to prepend a font awesome icon to your text
[[menu.main]]
    name = "Blog"
    url = "/blog" <-blogフォルダは後で消すのでpostに変えておく
    identifier = "fa fa-newspaper-o"
    weight = 1

[[menu.main]]
    name = "Categories"
    url = "/categories"
    weight = 2

[[menu.main]]
    name = "About"
    url = "/about"
    weight = 3

# Insert your username and the icon will apear on the page as long as
# socialAppearAtTop or socialAppearAtBottom is set to true in the params area
# The social media icons will appear on the sidebar
[social]
    github          = "jpescador" <-自分のgithubアカウントに
    bitbucket       = ""
    jsfiddle        = ""
    codepen         = ""
    foursquare      = ""
    dribbble        = ""
    deviantart      = ""
    behance         = ""
    flickr          = ""
    instagram       = ""
    youtube         = ""
    vimeo           = ""
    vine            = ""
    medium          = ""
    wordpress       = ""
    tumblr          = ""
    xing            = ""
    linkedin        = ""
    slideshare      = ""
    stackoverflow   = ""
    reddit          = ""
    pinterest       = ""
    googleplus      = ""
    facebook        = ""
    facebook_admin  = ""
    twitter_domain  = ""
    twitter         = "julio_pescador" <-自分のツイッターアカウントに
    email           = ""
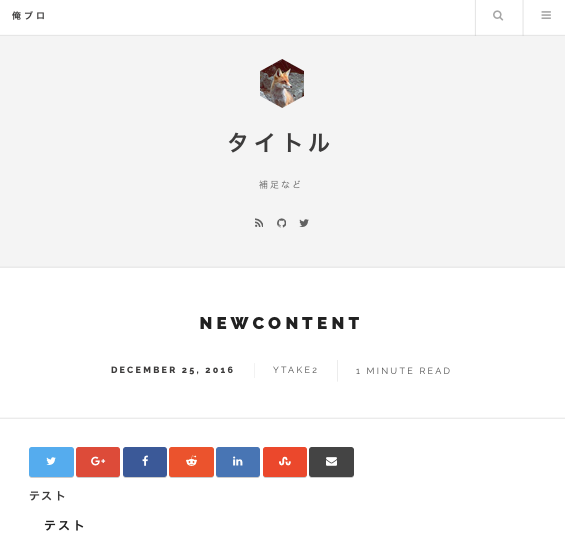
修正してみたのが以下
baseurl = "/"
relativeurls = true
languageCode = "en-us"
title = "俺のブログ"
theme = "hugo-future-imperfect"
preserveTaxonomyNames = true
paginate = 3
disqusShortname = "shortname"
googleAnalytics = ""

[params]
    # Sets the meta tag description, usually reserved for the main page
    description          = "メタタグ"
    # This will appear on the top left of the navigation bar
    navbarTitle          = "俺ブロ"
    # Social media buttons that appear on the sidebar
    socialAppearAtTop    = true
    socialAppearAtBottom = true
    # set this to the section name if section is not post
    viewMorePostLink     = "/post/"

# Optional Params
    categoriesByCount    = true
    includeReadingTime   = true
    # The set of favicons used are based on the write-up from this link:
    # https://github.com/audreyr/favicon-cheat-sheet
    # Please see the favicon partial template for more information
    loadFavicon          = false
    faviconVersion       = ""

    # Load custom CSS or JavaScript files. This replaces the deprecated params
    # minifiedFilesCSS and minifiedFilesJS. The variable is an array so that you
    # can load multiple files if necessary. You can also load the standard theme
    # files by adding the value, "default".
    # customCSS            = ["default", "/path/to/file"]
    # customJS             = ["default", "/path/to/file"]

    # Loading min files for exampleSite
    customCSS            = ["/css/main.min.css"]
    customJS             = ["/js/main.min.js"]

# parms.intro will appear on the sidebar
# This is optional, but it's suggested to use
[params.intro]
    header    = "タイトル"

    paragraph = "補足など"

    about     = "このブログ記事に関する説明"

# This will also appear on the sidebar.
# A width of less than 100px is recommended
# This is optional
[params.intro.pic]
    src       = "http://talk-goukaku.blog.so-net.ne.jp/_images/blog/_029/talk-goukaku/E7B791E381A8E8B5A4-4af27.png"
    # modify your picture in the shape of a circle or
    # future imperfect's hexagonal shape
    circle    = false
    imperfect = true
    width     = ""
    alt       = "Hugo Future Imperfect"

# Adjust the amount of recent posts on the sidebar.
# This is optional. The default value 5 will be used
[params.postAmount]
    sidebar = 2

# Set up your menu items in the navigation bar
# You can use identifier to prepend a font awesome icon to your text
[[menu.main]]
    name = "Blog"
    url = "/post"
    identifier = "fa fa-newspaper-o"
    weight = 1

[[menu.main]]
    name = "Categories"
    url = "/categories"
    weight = 2

[[menu.main]]
    name = "About"
    url = "/about"
    weight = 3

# Insert your username and the icon will apear on the page as long as
# socialAppearAtTop or socialAppearAtBottom is set to true in the params area
# The social media icons will appear on the sidebar
[social]
    github          = "ytake2"
    bitbucket       = ""
    jsfiddle        = ""
    codepen         = ""
    foursquare      = ""
    dribbble        = ""
    deviantart      = ""
    behance         = ""
    flickr          = ""
    instagram       = ""
    youtube         = ""
    vimeo           = ""
    vine            = ""
    medium          = ""
    wordpress       = ""
    tumblr          = ""
    xing            = ""
    linkedin        = ""
    slideshare      = ""
    stackoverflow   = ""
    reddit          = ""
    pinterest       = ""
    googleplus      = ""
    facebook        = ""
    facebook_admin  = ""
    twitter_domain  = ""
    twitter         = "psycle44"
    email           = ""
これを保存してbuild_site(),serve_site()で確認すると変更が反映されます。
いらないものを消す
いまのままだと、サンプルの投稿記事が残ってていまっているので消します。「content」フォルダ内のblogフォルダをdeleteします。
あとは、aboutページの内容も編集しておきましょう。編集するためには、contentフォルダ内のabout.mdファイルを修正すればOKです。
## githubにcommit push!!
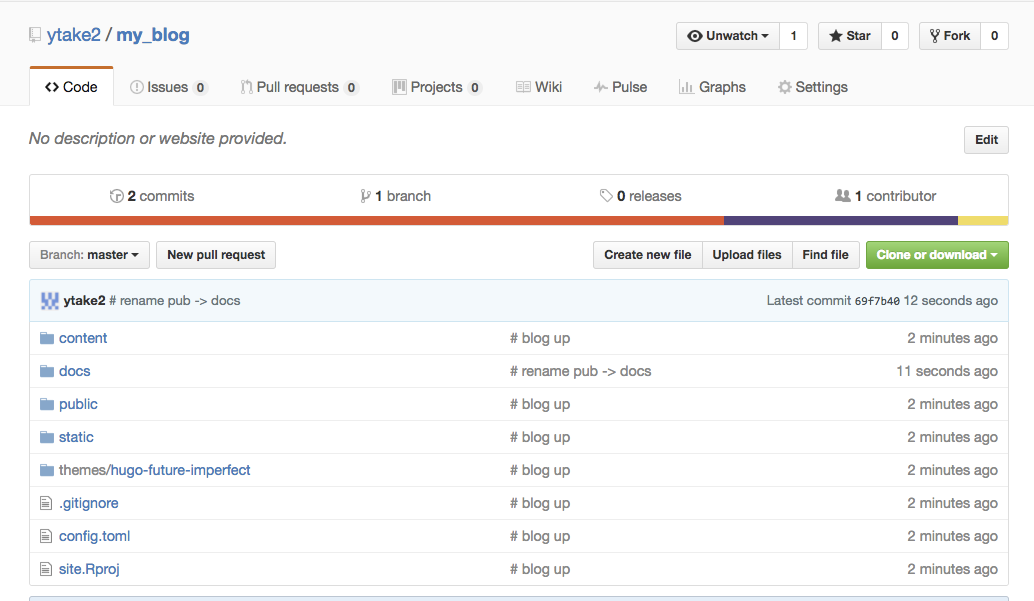
ようやく、サイトが出来上がりました。作成したものもののファイルを最初に作成したgithubのrepositoryにあげます。
githubにあげる前に少しだけ細工をします。publicフォルダの名称をdocsに変更しておきます。ただ、この細工は、githubでウェブページを公開する方法は他にもあるので、必ずしも必要な手順ではありません。RStudioでブログの編集するときには、一度publicにフォルダ名を戻して編集して、commitする前にdocsに変更します。
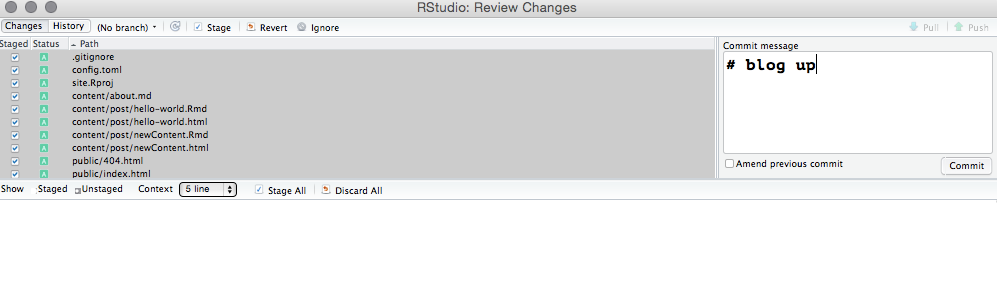
RStudioのgitタブをクリックして、全てのファイルを選択しCommitボタンを押します。
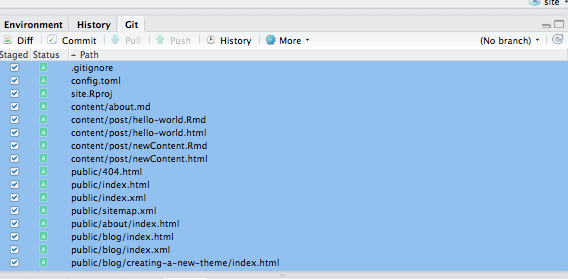
以下の画面が出てくるので、あとはcommitボタンをしてから、右上のpush!!
githubでブログページを公開
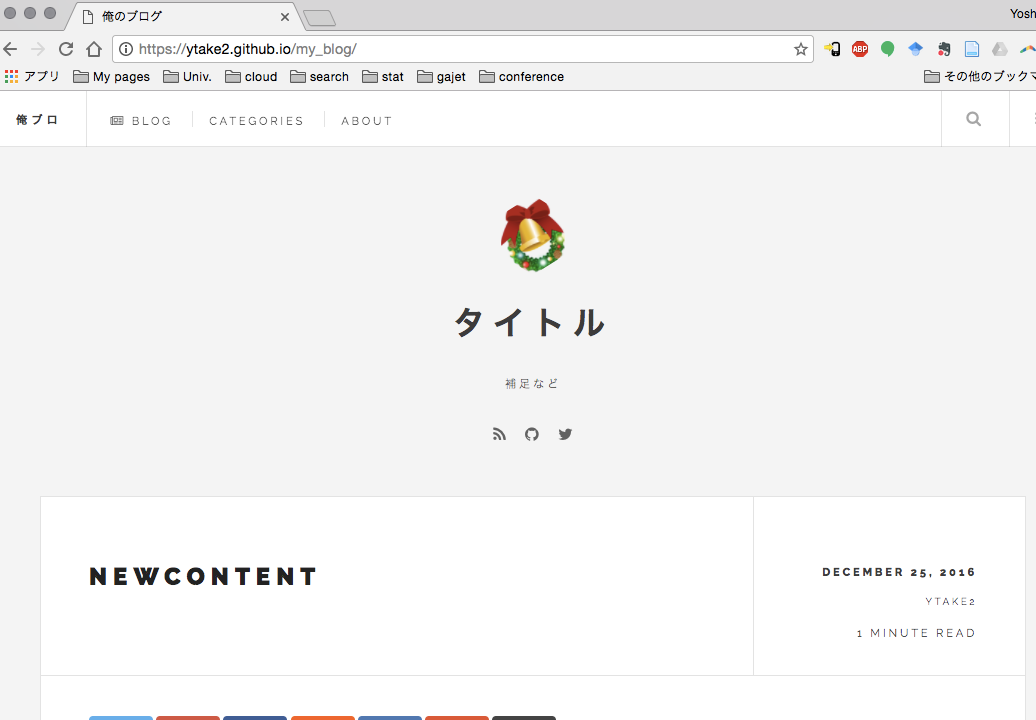
最初に作ったmy_blogというリポジトリに、RStudioで構築したブログサイトのファイルがアップされました。
これを公開するためには、「setting」->「github pages」のsourceタブをクリックして「master branch/docs folder」を選択してsaveボタンを押します。
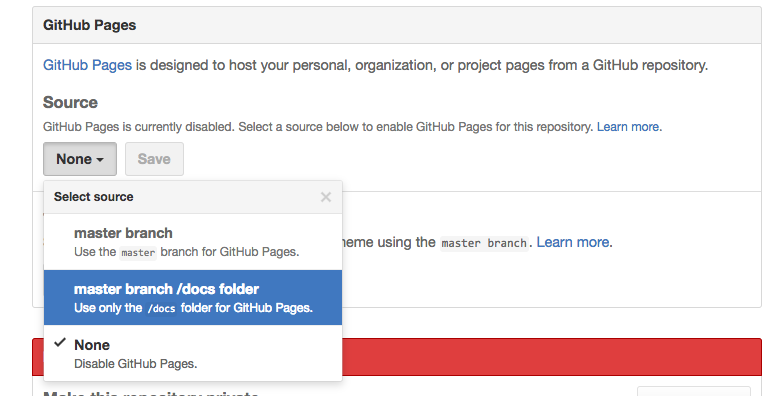
すると以下のように、公開サイトのリンクが出現します。
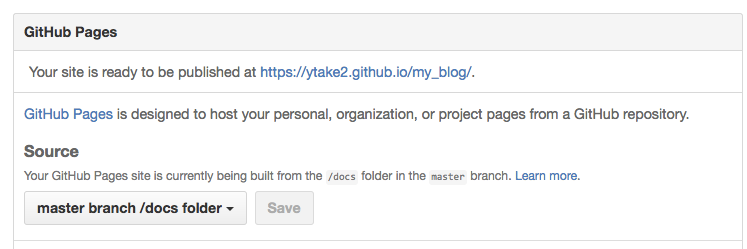
できた。
https://ytake2.github.io/my_blog/
ちなみに、hugoのテーマサイトから好きなテンプレートを確認して、githubのユーザー名とレポジトリ名をnew_site関数にしてあげると、自分好みのテンプレートが使えます。
new_site(theme="alanorth/hugo-theme-bootstrap4-blog")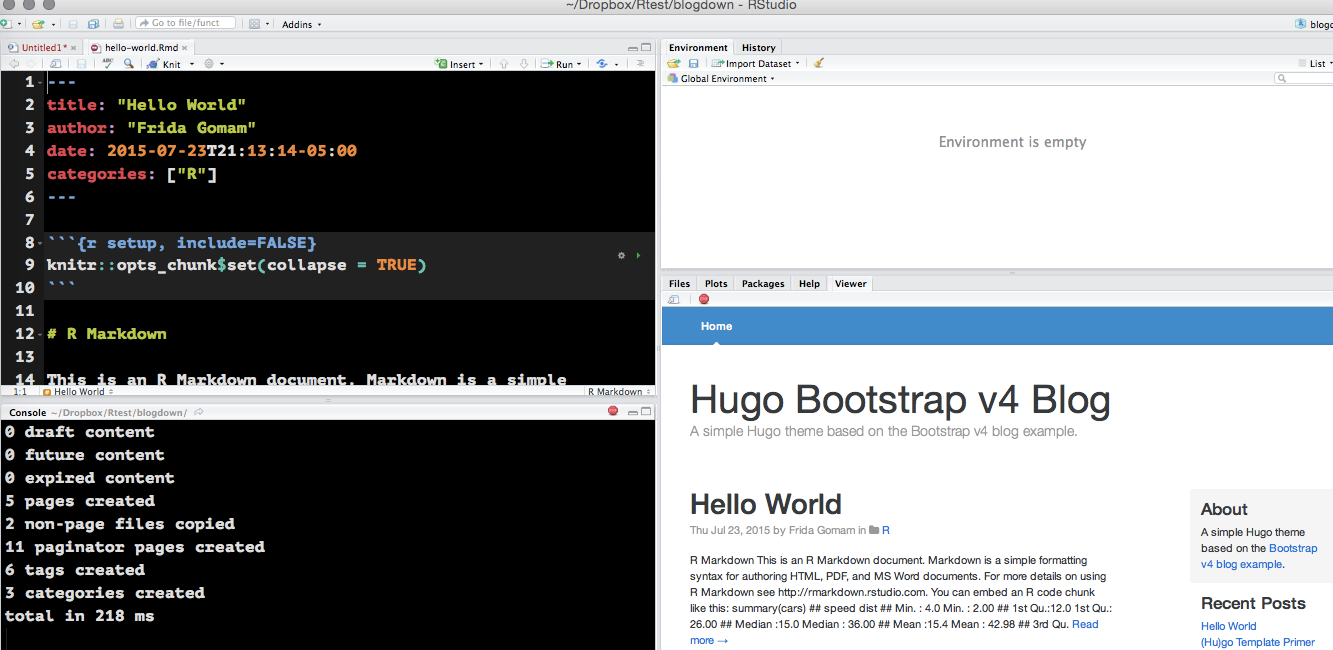
シンプルでおしゃれなブログが、できてしまった。それがRStudio、Markdownだけで管理できるなんて、最高じゃないか。